
Privacy today has become increasingly important. Especially now that we’re storing more and more of our information on our mobile phones. Technology has allowed us to use our mobile devices to capture and store not only memories but also important documents like driver’s license for ease of access. However, that comes with it inherit risk like your phone getting stolen or lost and then those valuable information could end up on the wrong hands.
Apple has developed many privacy-centric features that allows iPhone users to not only hide or protect their photos but other documents as well. This allows users to feel safe about the pictures that they store on their iPhones.
After all, private memories and moments should stay private. In this article, we’ll take you through a step-by-step process of how to hide your photos on your iPhone.
Create a “Hidden” Album
The best way to hide pictures on your iPhone is to hide them using the built-in feature of the photos app. You can create an album of pictures you don’t want people to see and mark it as “hidden.”
Here’s how to do it:
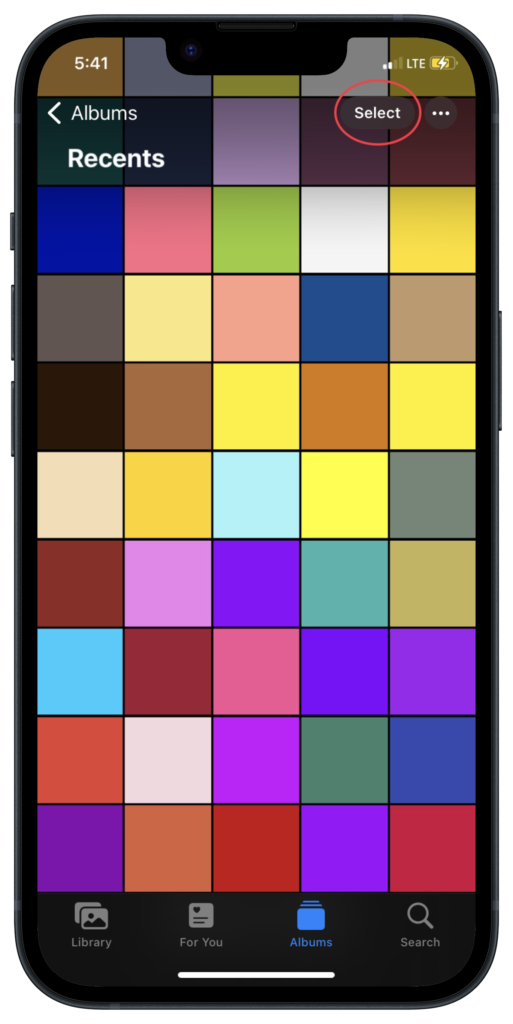
1. Navigate to your iPhone’s Photos App
2. Open the current photo library and tap Select in the upper right corner of the screen.
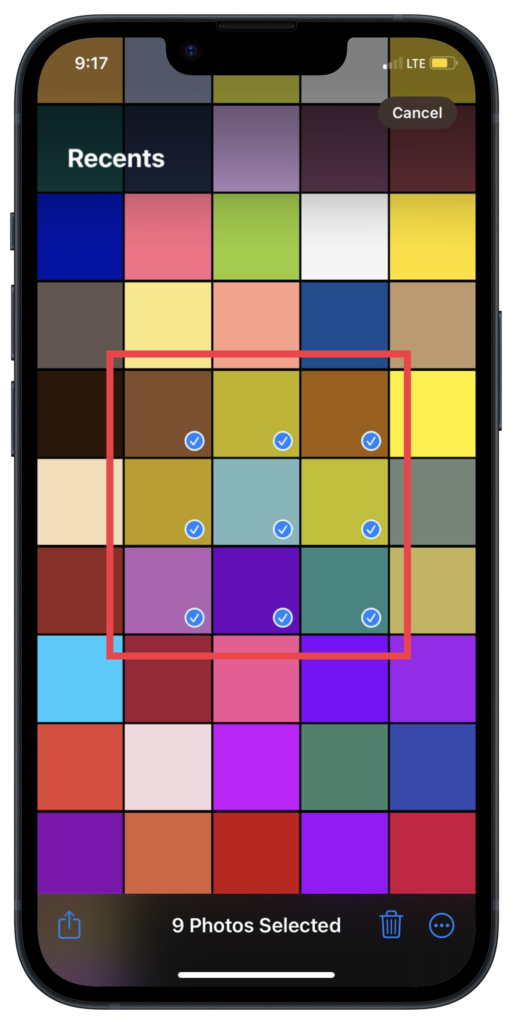
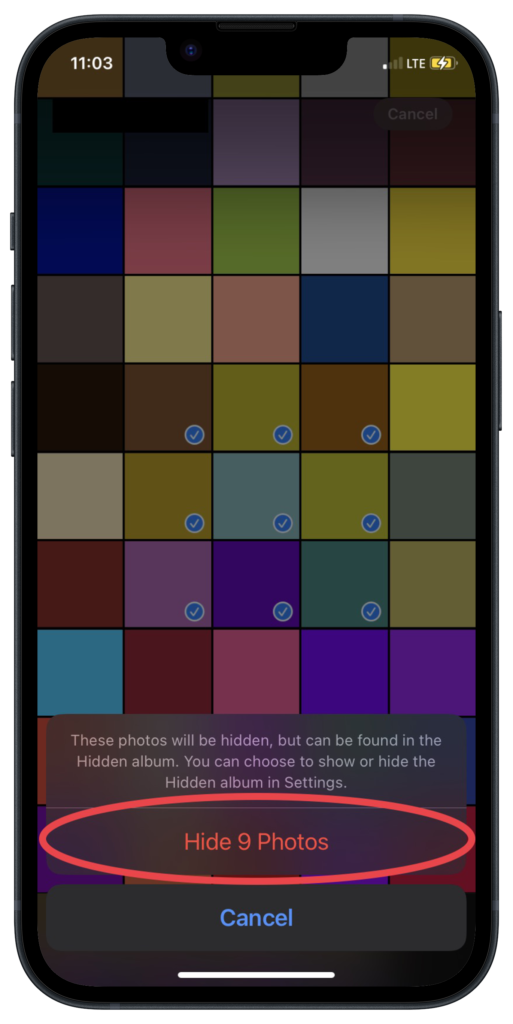
3. Tap the photos you want to hide (a blue checkmark will appear on the bottom corner of the image).
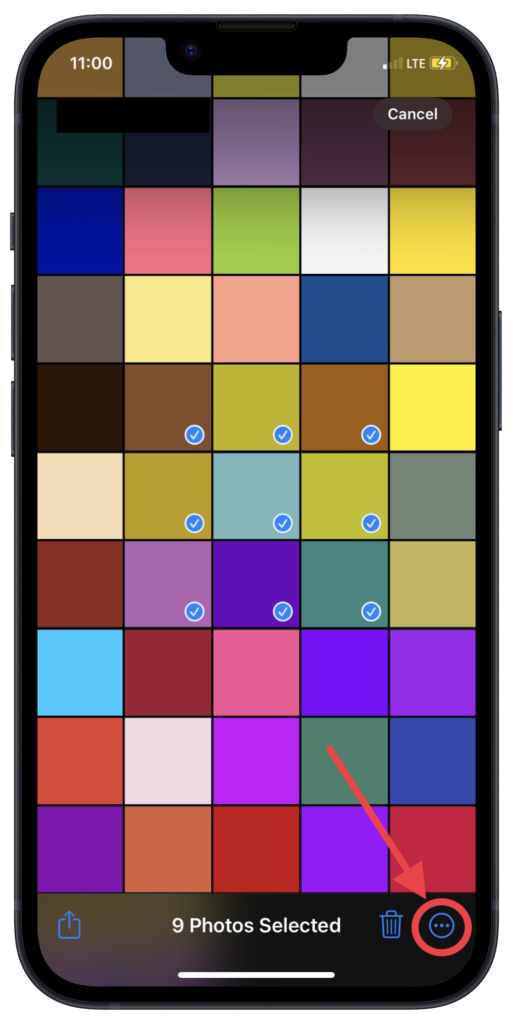
4. Tap the “More” icon at the bottom right corner of your iPhone screen (it’s the circle with three dots).
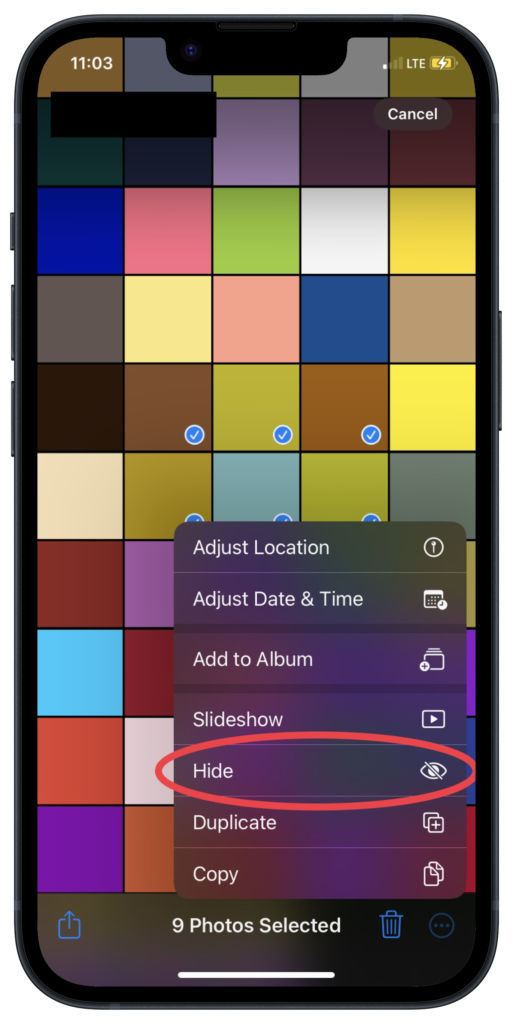
5. On the popup menu, tap “Hide” (it looks like an eye with a slash through it).
6. Confirm by tapping Hide Photos.
This will move the photos into a hidden album. Next, we’ll go over how to access them.
How to Access Hidden Album on Your iPhone
Accessing the Hidden Album is easier than it seems.
1. Simply go back to the Photos app.
2. Select the Albums tab at the bottom.
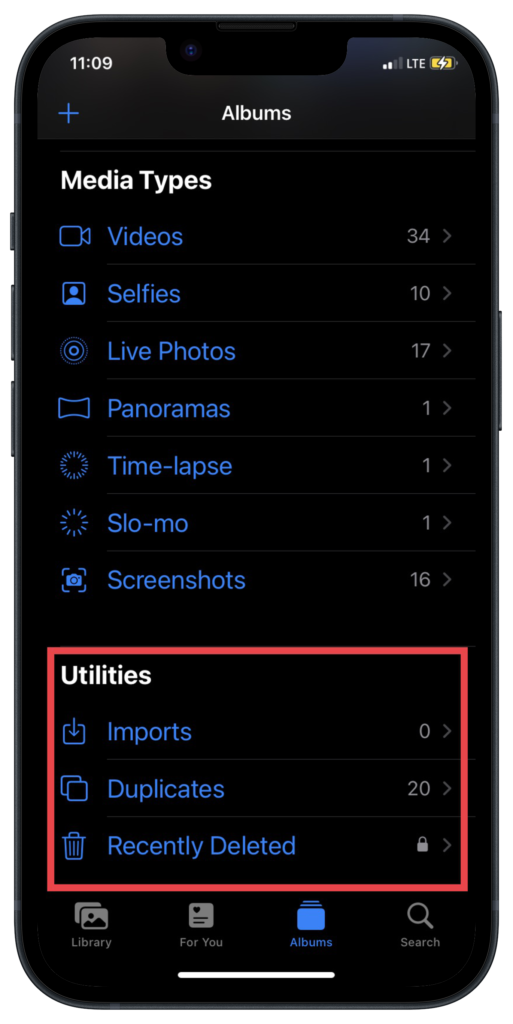
3. Scroll down until you see a section called Utilities, then select Hidden.
4. You will be prompted to enter your passcode, Touch ID, or Face ID that you use to unlock your phone. Simply enter it in and you can access the hidden album (unless you disabled the passcode requirement for the hidden album).
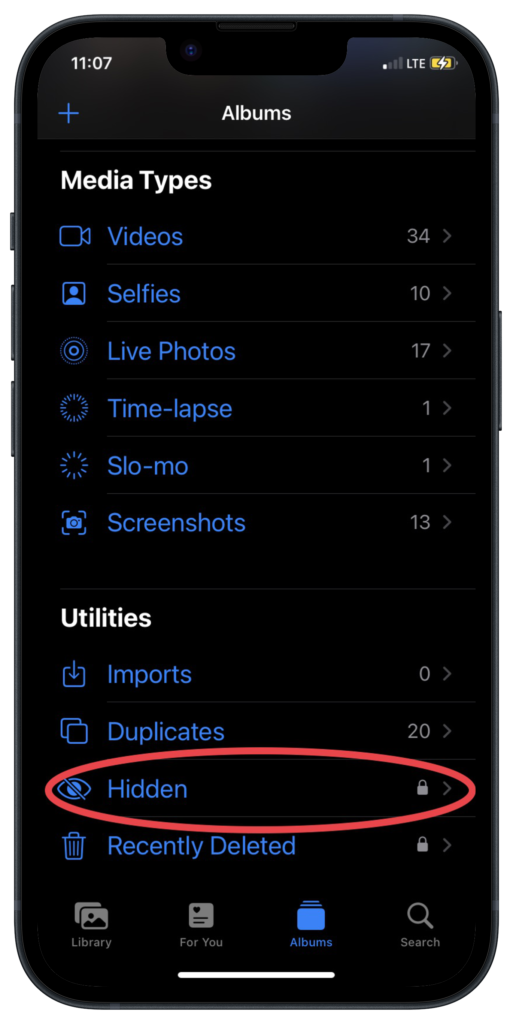
In that section, you will find the hidden album where all of the photos you selected are stored.
To unhide the photos, tap the “Select” at the top right corner of your screen, tap the three dots at the bottom right corner, and then select “unhide”.
How to Hide the Hidden Album on iPhone
Now you know how and where to locate the hidden album. Next, we’ll look at how to hide the hidden album for extra safety.
Because everyone who knows about the hidden album can access it if they got ahold of your passcode, you can further safeguard your “Hidden” album by hiding it.
Usually you’re able to see the hidden album because your current settings allow it to be viewable.
However, you can disable the ability to view it by following these steps:
1. Go to the iPhone Settings app, scroll down until you see the Photos section and tap it.

2. Toggle the Hidden Album option to off (it should say “Show Hidden Album”.
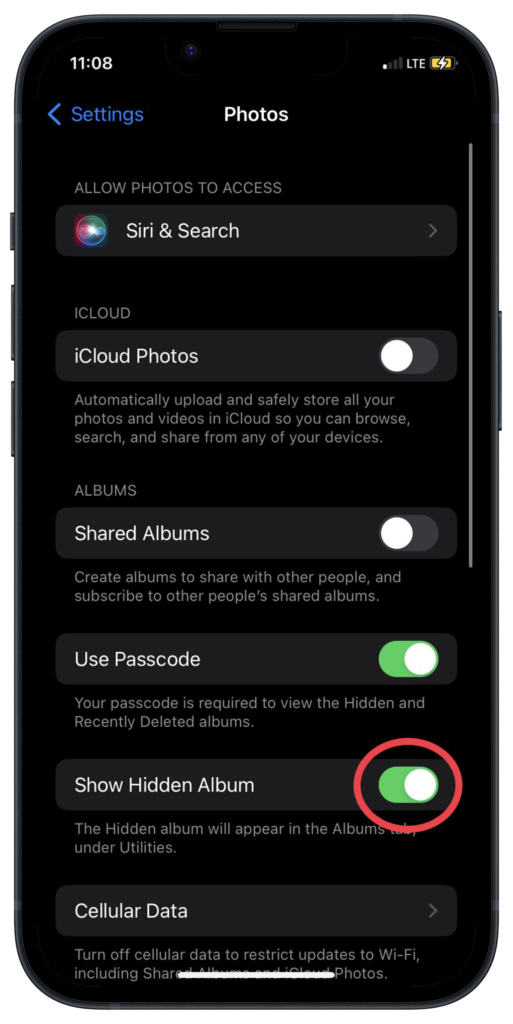
Go back to the Photos app and make sure that you can no longer see the Hidden album under the Utilities section.
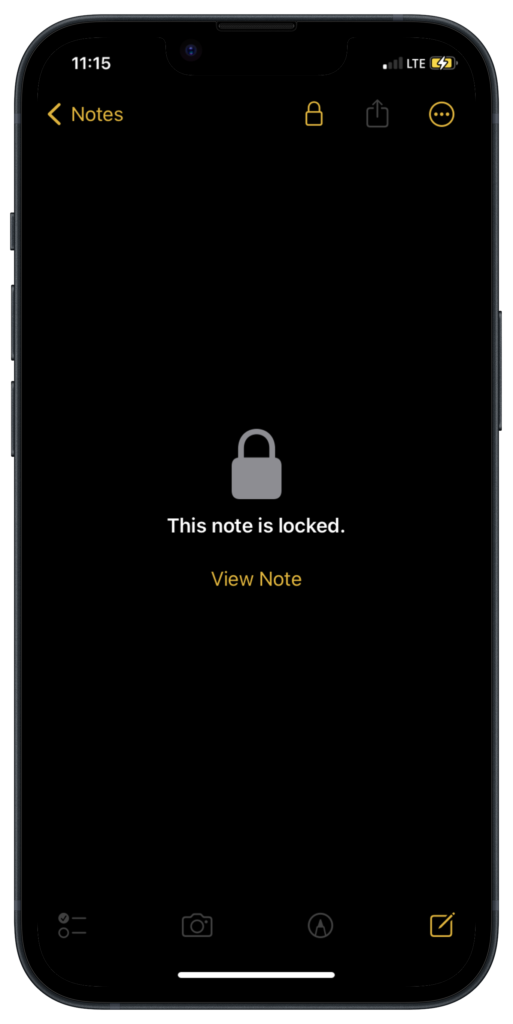
Lock Your Photos With the Notes App
One more way to secure photo access is to use the Apple Notes App. You can lock images through Notes using your passcode and a separate password, Touch ID, or Face ID.
How to Lock Your Photos Using Notes
First, let’s choose a password method to lock the notes where you’ll add the photos you want to hide.
1. On your iPhone, go to the Settings app, scroll down, and select Notes.
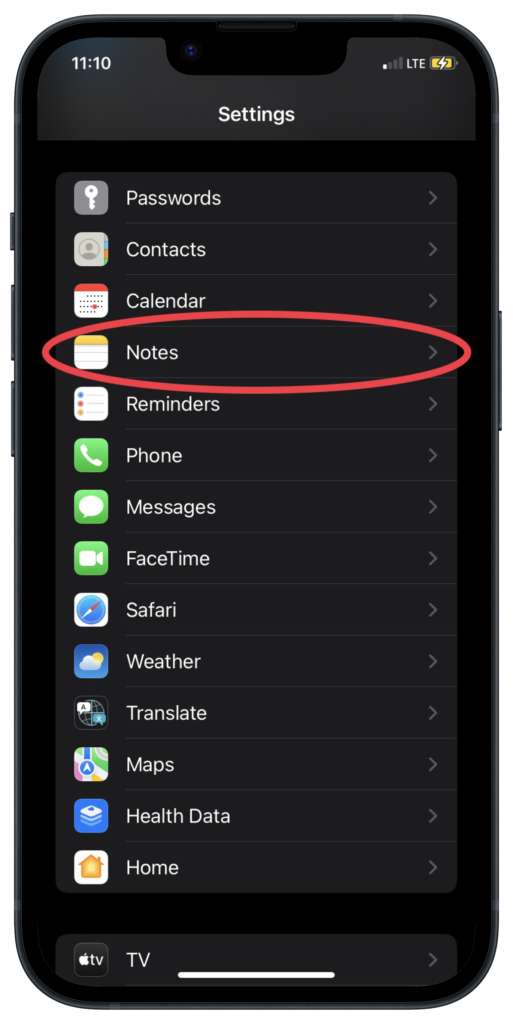
2. Select Password.
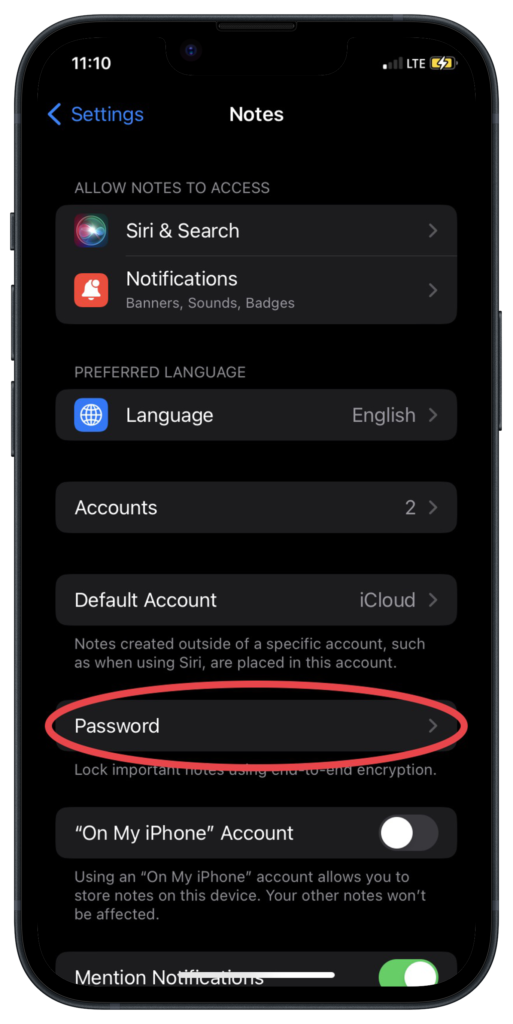
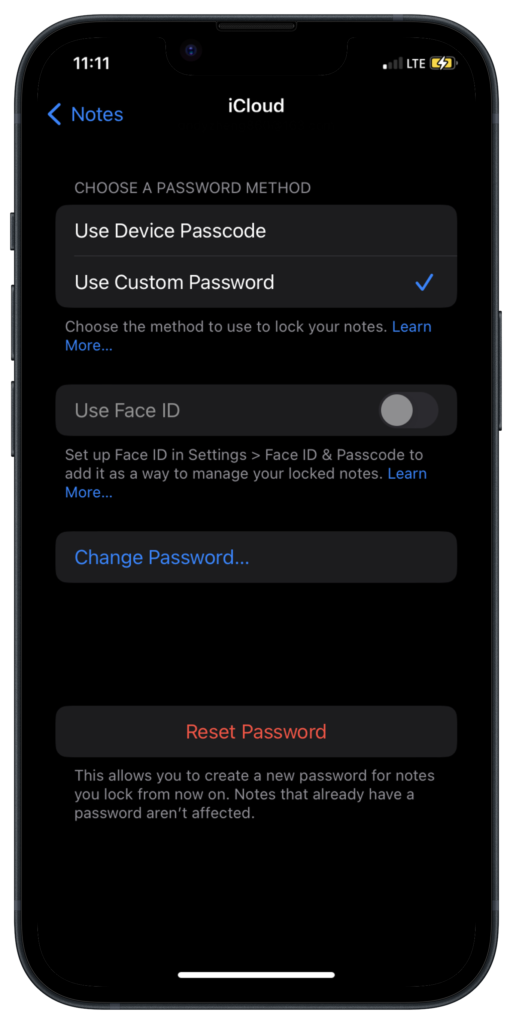
3. You can use your iPhone passcode or create a new password. Additionally you can enable Face ID (if your device supports it) for even faster access to your locked notes.
How to Add Photos to iPhone Notes
With this feature enabled, you can now add photos to your password-protected notes. Here’s how it works:
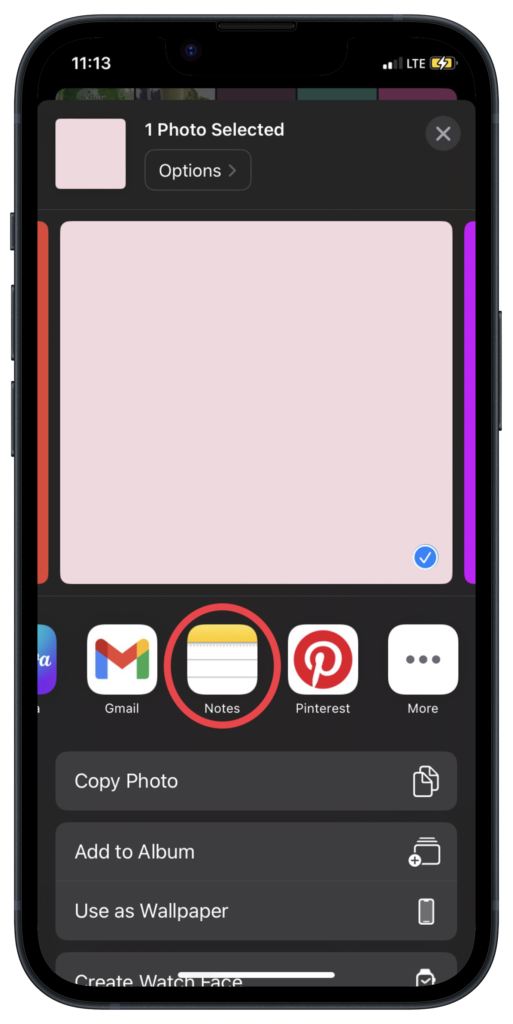
1. Open the Photos app on your iPhone and select the photos you want to hide.
2. Tap the Share icon (looks like a rounded square with an arrow pointing up) and select Notes.
3. Choose “New Note” to create a new note, or tap Save at the top right.

4. In the Notes app, open the note with the photo.
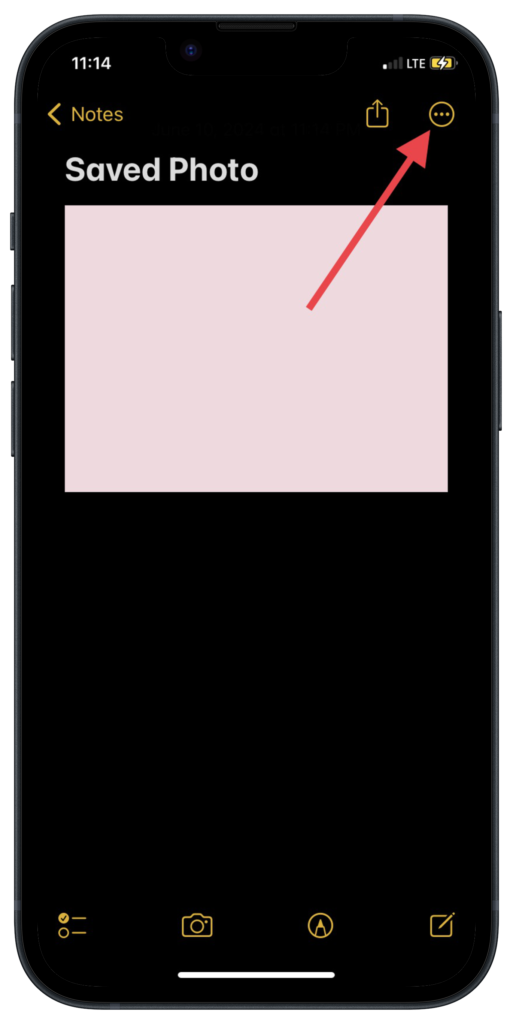
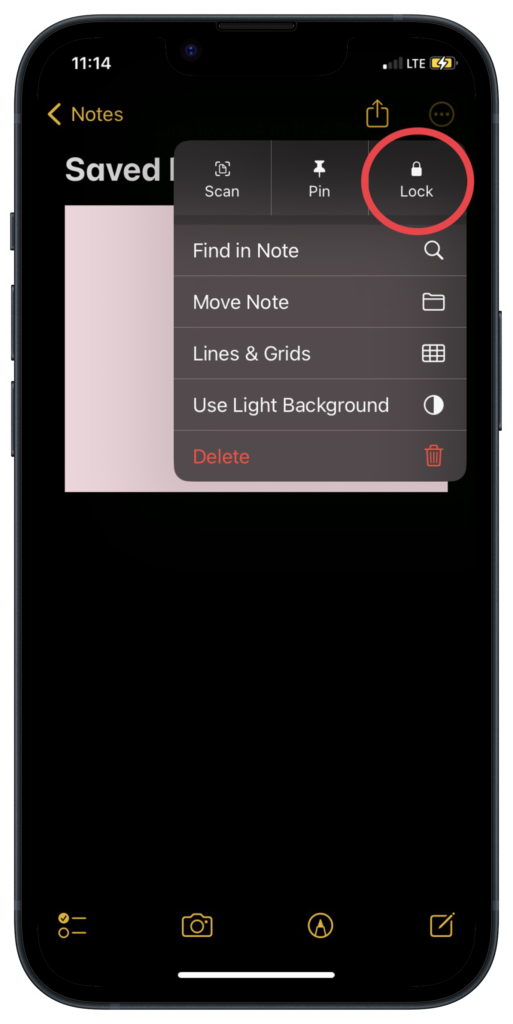
5. Tap the more options (three dots) at the top right, then select Lock Note.
6. Tap the lock icon at the top to lock the note.
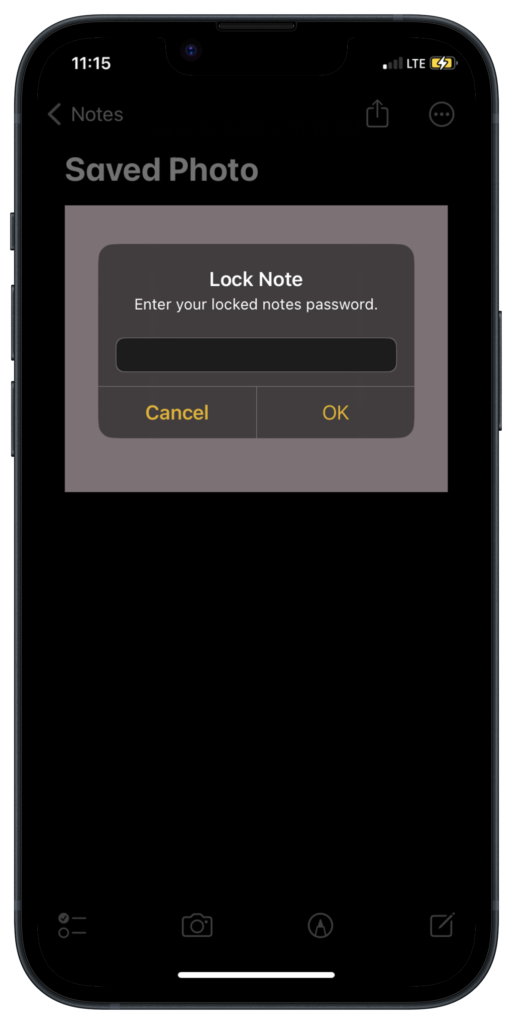
Enter your password that you set for the notes and tap OK.
Tap the lock icon at the top of your screen to lock the note.
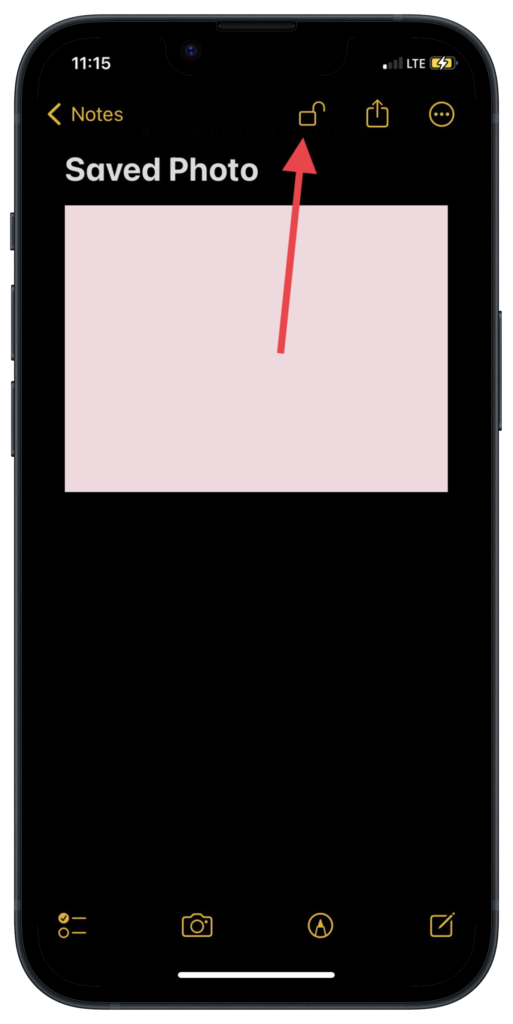
This will lock your photos behind a password and only accessible if you type in the password
What this does is make a copy of the photos into an Apple Note. However, the original photos will still exist in your photo album.
You can choose to delete all of the selected photos from your album.
That way, you can secure your photos even more because they won’t be in the Photos app
Since they are in the Notes app and are accessible only through password, it means that only you or whoever has the password can access them.
Conclusion
Taking photos is a big part of our lives. Our mobile phones comes equipped with the ability to do so. Some photos we’d want to share while others we’d want to keep to ourselves. Apple has made a considerable effort to making sure that what we want as private stays private.
These built-in features allows us to hide photos are a great way to go that extra distance to keeping photos private.